Sunday, March 30, 2014

Simple Chic Bridal Shower

Today I brightened another rainy day bridal shower with bright, springy cake pops!  My friend Becky is in a wedding this spring for a friend of hers, and I'm happy she asked me to make these for the shower!


These were simple and chic, not a whole lot to them in terms of complexity--the shower was meant to be simple but elegant and that is what I was going for here with scroll piping patters, fondant flowers and muted white/gray colors with pops of pink.


I went with the square plate for this one, as I think they are simple and allow the cakes to shine on their own without the distraction of ribbons and bows. 


Sixty little cakes, in red velvet, vanilla and chocolate flavors, sure to brighten anyone's day!


I hope the bride loves them!


-Elena


Wednesday, March 26, 2014

The Rose Bud Birthday Cake

Even though it is still a little chilly, and I am feeling a bit under the weather, it still does not change the fact that I am yearning desperately for spring.  I want to put the uggs and jackets away and slip on my capris and a light sweater and not worry about being cold! I want the sun to shine and the flowers to bloom and have it be warm enough to run after work everyday without a scarf and gloves!

With my mom's birthday in sight, I knew I wanted to make a cake that evoked the feeling of spring. I wanted to make something fruity and sweet, fresh and aromatic to celebrate her special day. As I perused some of my favorite food blogs, I found a recipe for a fluffy lemon rosemary cake, and I knew this was it!  My mom absolutely loves lemon cake, and the thought of using my absolute favorite savory spices in a dessert was super exciting.  I love rosemary. I go to Whole Foods and buy a few twigs of it, dice it up and mix it with butter to pour over purple potatoes and it's the best side dish EVER.  However, I would never have thought to use it in a dessert!  This cake has proved how versatile this spice is, and now I love it even more.


Adding 100% fresh ingredients to cake batter gives your senses something more-- you're feeling and tasting these ingredients while creating a visual in your head of what you're eating. I love that.


First, the dry ingredients-- flour, baking powder, baking soda, salt and sugar.
Then the wet ingredients--melted butter, buttermilk (I used almond milk + lemon juice), oil, vanilla, lemon zest, egg yolks and then the minced rosemary.


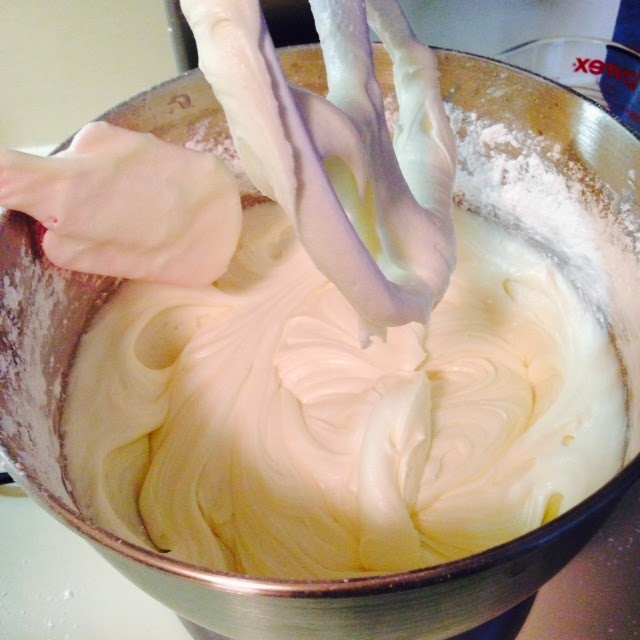
The great thing about this cake is it is made with a meringue! My mom LOVES meringue! I am not a meringue fan (I dislike eggs, a lot) but it is mixed in with all the ingredients at the end of the mixing phase, so it adds a fluffiness to the cake without eating a large layer of meringue on top like a lemon meringue pie.  With that said, then you make your meringue by mixing egg whites and sugar until stiff peaks form. 


 After incorporating the meringue into all the other ingredients CAREFULLY (don't want to deflate all the air you just whipped into your meringue, that's what gives the cake its fluffiness), you bake for 25-30 mins at 350 degrees!  Once the cakes were done, I cooled them, wrapped them and threw them in the freezer until I made the butter cream which was today!  This is when it gets fun-- carving the cake and icing it! 

So I carved away... Due to the meringue they baked a bit unevenly on the top but I did not worry, as you always cut off the top part and the sides of the cake before icing!  I decided on an almond butter cream which I added some fresh lemon juice to.


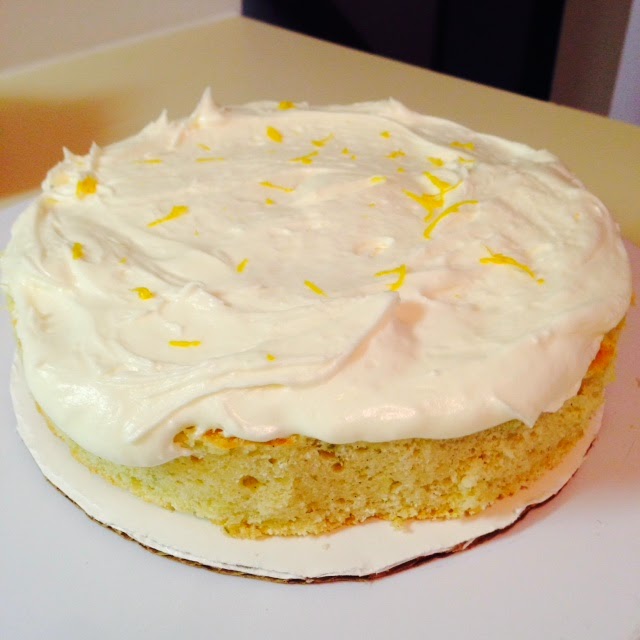
Filled the middle with butter cream, then added some lemon zest shavings for an extra lemony flavor!  Usually I would take better care in cutting my cake edge and cake round but due to my plan to ice it, it did not matter if it was cut evenly.


Once the middle was filled, I put the second cake on top and did a crumb coat. This crumb coat was a bit thicker than I would usually do, but again, my plans for later meant I needed to do a thicker coat.  I then put it in the refrigerator to set.


Of course, my displays mean just as much to me as my actual product does, as you eat with your eyes before your mouth, so I wanted to choose a cake plate that would be simple but gorgeous, and leave the cake to really shine on its own.  So I chose this vintage glass plate that my Grandma Pauline gave me! I absolute love it and I know my mom will too since it is her mother's plate.


In terms of icing the cake, I have been waiting to try and make a rose bud cake. I think it is such an elegant but again, simple design.  So I attempted, using my Wilton 1M tip.  Just start in the middle and twist as you make round "roses" that sort of overlap each other. You don't want to see the cake underneath. 


And here we have the finished product!  I did two layers of roses on the side, and three in the middle, with the outer layer sort of on top and on the side to blend and give the cake a more "rounded" look.  


Adding yellow and silver sugar pearls on top gave it a more "romantic" feel. Plus my mom loves silver!  And the yellow hints at the lemon flavor!


God I love beautiful food!


My mom loved it and we all devoured a piece as we sat around the table, sniffling and coughing because we're all under the weather! The almond butter cream was so smooth and complimented the lemon cake beautifully! I can't wait to make the cake again, and experiment with different sized tips to make different roses. It was very fun to make and I'm happy my end product was amazing.


-Elena


Sunday, March 23, 2014

Tea Time

It was cloudy and chilly today but that did not stop us from showering my cousin Nick's fiancee Nicole with gifts and love at her bridal shower tea! It was a lovely event, held at an old meeting house in Billerica where the decor was vintage and antique with creaky hardwood floors and exposed beams.  We sipped mimosas, chatted with everyone and ate lots of finger foods.. and of course, cake pops!

I was very honored that my Thea asked me to put together a cake pop display in place of a cake!  Nicole's wedding colors are purple and white, and theme of the shower was a tea party, so I went with it! 


I knew I wanted to make tea pots and calla lilies, which are in her bouquet, which meant a lot of fondant work.  Needless to say, I started planning early in the week so I could finish it all in time!


Slowly but surely, teapots were born!


I took a stab at making sugar calla lilies! I had never made fondant flowers before, especially ones by hand! But with a little online research, I figured it out! I dusted the middles with purple sugar dust to give them a more "real" effect.


The final product was stunning. The plates certainly were the focal point of the room!


I wanted to create a "topper" that Nicole could keep! So I added a tea cup on top and a bunch of sugar calla lilies on top of a giant cake pop!  I really thing it brought the display together.  The tea cup was just too cute.


My yiayia did the table centerpieces, which were tea pots with arranged flowers. Absolutely stunning! She has such an eye for flowers and plants, I wish I had her green thumb!


My and my beautiful sister/cousin Anastasia

 Very excited for the happy couple!  I wish you both a lifetime of happiness and am thankful we got to share your special day with you! Can't wait for your May wedding!


-Elena

Tuesday, March 18, 2014

Mama and Baby

This weekend I put together a baby shower display for an old childhood friend.  Brittany and I grew up together, loving Britney Spears and Spice Girls, playing soccer and having sleepovers.  We spent hours singing into hairbrushes and dancing around her kitchen, doing our hair and make up and having an absolute blast. Here we are below--pre braces.  Check out the tattoo necklace.. soo hilarious!


Her and her fiancee are expecting a little girl, and I was so happy to create a display for her shower!

Brittany's shower was elegantly put together by her sisters and family, and had a "spring" theme with fresh flowers and vintage chalkboards, mason jars and white lanterns.  For the display, I went with the colors of the invitation -- tiffany blue, lavender, pale pink and mint green.  I wanted the display to be vintage, girly, and ultimately evoke the feeling of spring (I know we're all itching for it!)

I also recently picked up two new cookie cutters, a mama bird and baby bird, which I thought would be perfect for a baby shower (and I've been secretly dying to use them!!)  Definitely my favorite aspect of the display and was a perfect way to mix baby shower with spring


I actually use cookie cutters often when I create cake pops.  It's an easy way to get the perfect shape with cleaner lines as opposed to hand shaping them.


These paper flowers I picked up were so perfect, I swear they were made specifically for me, for this shower! I love when it all comes together perfectly!  I went with the round plates for this one, as the ribbon colors really pulled it together and I think they're nice and girly.


Finished product!


I had picked up this bird cage candle holder a few years ago, and it went with this theme perfectly!  It was like the mama was watching over her baby, waiting for it to come out of its cage! 


I wanted to stick to their mason jar theme as well, and adding another baby and mama bird in with the taste card was a nice accent.


I just loved the paper flowers!  


These were the little jars given to the guests to drink from with a candy binky! Such a creative idea!


Pretty table settings!


It was lovely seeing Brittany and I am happy everyone enjoyed the cakes!


On to the next project!! Busy Busy is the best way to be! :)

-Elena

Tuesday, March 11, 2014

Five Ingredient Protein Bars

Adulthood has taught me a lot of things... life isn't as fun as when you were a kid; the real world is expensive; there are bad days (weekdays) and good days (weekends); the littlest things will make your day (like a Reese's cup.. or a bottle of wine). I think the most important thing I've learned so far though, is in order to be successful you need the right tools for the job.  You can try your damn hardest at something and give it your all but without the correct tools, whether they be physical tools or metaphorical tools (support, confidence) it can't be done.

In the kitchen, I feel super prepared. I've accumulated so much stuff; been given lots of tools from grandparents and my mom and friends; I usually always have what I need.  Except for lately... When I moved, I didn't think of the most important tool I need to do ANYTHING related to my baking -- a mixer.  Ohhhhh it's been fun without one! I've been hand mixing cakes (I make 4-6 a week).  I've been whisking and mixing and using my little $19 smoothie mixer from Target to break things down and sort of mix them.  Meanwhile, I've been ferociously stalking any website that carries Kitchenaid stand mixers, waiting for them to go on sale.. and today was the day!!


My baby! God it's beautiful!  Yes, I dream for the 7qt, but that will be on my wedding shower registry ;) This baby will hold me over!

So naturally I rushed home, decided I'd go for a run, and use the mixer to motivate me to move my butt so I could get back and use it!  And that is what I did!

I made five ingredient protein bars! Delicious, so easy, and healthy!).  The thing about protein bars is most of the recipes call for some sort of flour other than gluten flour (rice flour, almond flour, coconut flour) which are all so drying and end up tasting awful, especially when mixed with protein powder (also drying!).  I am using oats instead!  I like this recipe because it omits flour (yay!), is low on sugar, and is still moist and yummy!


The first five ingredients are the base. The "Optional" ingredients are what make them yummier! Use whatever you'd like!

Five Ingredient Protein Bars

2 Cups of Oats (I had instant oatmeal on hand, worked great)
1 Cup Almond Butter, plus more for later (you can use PB if you want)
2 Scoops Protein Powder  (I used vanilla)
1/3 Cup Honey, plus more for later
1/4 Cup Almond Milk, plus more for later

Optional
1/4 Cup Chocolate or Butterscotch Chips
1/4 Cup Dried Fruit (cherries, cranberries)
Shredded Coconut

Preheat oven to 350.  Spray a glass 8X8 baking dish with non-stick spray.  Combine oats, almond butter, protein powder, honey and almond milk in a mixer until combined.


It should not be soupy! You want minimal liquid, just enough so it all sticks together. Essentially you should be able to pick up the entire mixture as a "ball." 


Add in a little more almond butter and a little more honey if needed, until your mixture is sticking together.  If desired, toss in chocolate or butterscotch chips and/or dried fruit. Pour your mixture into the prepared baking dish.  


Press your mixture into the dish, covering the bottom.


If desired, drizzle honey on top and sprinkle coconut shavings on top.


Bake for 15 to 20 minutes.  Let cool, cut up, and eat one a day in the AM to stave off those 10:00am hunger grumblings :)

I already ate one!


There's so many things you can do with this 5-ingredient base. Have fun with it!

Well this weekend is the start of my busy month!  Some really exciting projects to come, can't wait to share here on the blog! Stay tuned!

-Elena