Showing posts with label dessert. Show all posts

Thursday, May 21, 2015

Love is Sweet [Maureen's Bridal Shower]

Saturday was Maureen's bridal shower, and what a beautiful day it was!

It was cool and dewy, the sun popped out, the house was decorated, food was delicious, and the desserts were of course, sweet!

We went with a vintage country theme because that is "so Maureen" :) I love the additions of the burlap, chalkboards and doilys... Country but elegant!


These napkins from Wedding Paper Divas are just to die for! 


"H" for Hartmann!


For favors, Megan and I made chocolate lollipops, because who doesn't want to leave with something sweet and delicious!?


A stunning tablescape done by Maureen's Mom. The china is just beautiful!


The bride with her MOH and bridesmaid!


I just love her and couldn't be happier for her!


It was truly a stunning day filled with so much laughter and love!
I can't wait for 9.12.15! 


Tuesday, March 17, 2015

Boozy Irish Car Bomb Cupcakes

I am not Irish.. at all.. 

I did grow up celebrating St. Paddy's however with my best friend Maureen and her very Irish family.  In 6th grade I went to her house after school on St. Patrick's Day, and when I opened the fridge at her house, her Mom had dyed the milk green.. and I remember freaking out, being so confused! What was all this green stuff? Such a funny memory :) 

St. Paddy's was a blast in college.. from what I can remember..... Blarney Blowout at UMass was a religion, back when it was just drunken fun and there weren't cops with bullets and student arrests plastered on the front of Yahoo.com... Happy to see that didn't happen again this year!

I guess I am super off topic here.. What I am trying to say is that St. Patrick's Day has always been a fun one to celebrate! This year we won't be doing any drinking or partying, but I did whip up some of the best cupcakes I've ever made, complete with three kinds of booze... and brought them to work! HA! 

Guinness & Butter

These are Guinness chocolate cupcakes with Irish whiskey ganache filling topped with Bailey's butter cream.. Holy heart attack but SO worth it. Yes I had one for breakfast. Yes I'll be running three miles on the treadmill and doing HEAVY dead lifts tonight... Life's about balance, right? ;)


The best thing about these cupcakes is the balance of flavors. This is not a sugary sweet chocolate cake like you'd have for a birthday cake. The sugar content is much lower, and there is a higher amount of unsweetened cocoa powder for a more muted sugar flavor. The beer just mutes it even more.. The ganache definitely has a bite (I used more unsweetened chocolate) and the whiskey adds a tart flavor.  All is balanced with the butter cream, which is very sweet and creamy! 

These aren't hard to make! Three separate ingredients from scratch can be daunting.. If you are afraid to attempt, just skip out on the ganache and go for regular cupcakes! Still just as tasty! 
 

For the Guinness chocolate cupcakes:
1 stick of butter, room temp
1/2 cup Guinness beer
1 cup granulated sugar
1 cup flour
3/8 tsp baking soda
3/4 cup dutch processed cocoa powder
pinch of salt
1 egg
1/3 cup sour cream

1. Preheat oven to 350.
2. On the stovetop, melt butter and Guinness over medium heat until simmering.
3. Whisk together sugar, flour, baking soda, cocoa powder and salt. 
4. In a seperate bowl, mix egg and sour cream until combined.
5. Once the butter/Guinness mixture is simmering, remove from stove and pour into the egg/sour cream mixture. Mix until combined. 
6. Add the sugar/flour mixture and mix just until combined! Do not over mix!
7. Put into cupcake wrappers and bake for 17 minutes. 

Let cupcakes cool, then dig out little center holes for the ganache filling. 


For the Irish whiskey ganache:

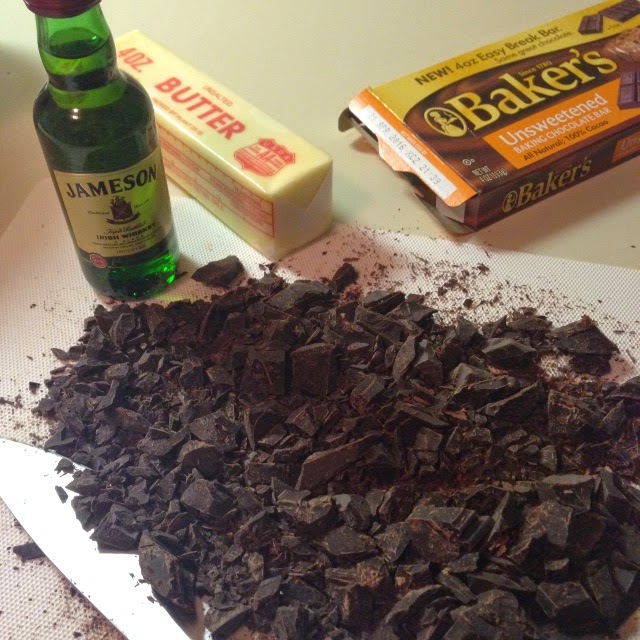
4oz unsweetened dark chocolate
1/3 cup heavy cream
1 tbsp butter
1 tsp Jameson Irish whiskey 

1. Finely chop chocolate into small pieces and place into a heatproof bowl.
2. Heat heavy cream on stove top over medium heat until simmering. Pour simmering cream over chocolate. Let stand for 1 minute.
3. Whisk the chocolate and cream mixture until combined.
4. Add butter and whiskey. Mix again until combined.
5. Let it cool but it must still be warm enough to pipe. Pipe into the centers of the cupcakes. 


For the Bailey's Buttercream:

1/4 cup Bailey's Irish Creme (I used two nips)
2.5 cups of confectioners sugar
1/2 cup butter (1 stick) at room temp

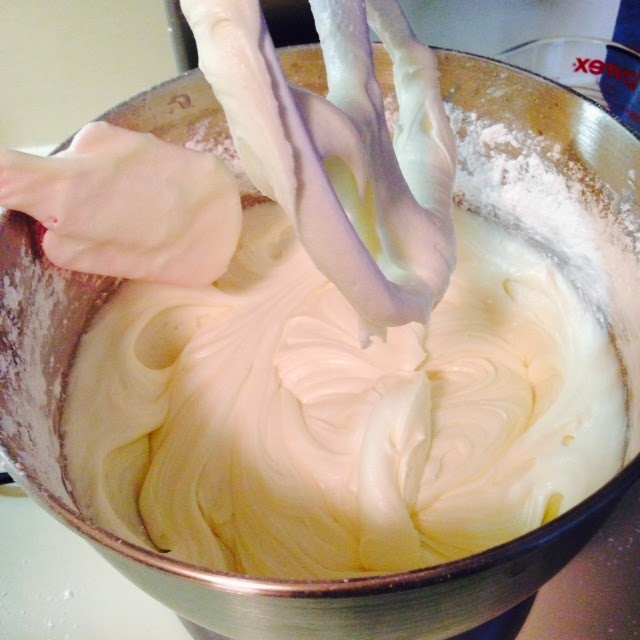
1. In a stand mixer, cream butter until it if white and fluffy, about 5 minutes. 
2. Add in sugar and Bailey's, alternating and mixing in between additions until all is combined. 
3. Whip for 6-8 minutes until soft and creamy. Pipe onto cupcakes.


Finally, DEVOUR! .. for breakfast if you want ;) 


St. Paddys baking is always a favorite of mine!! Here are some pot O' gold cake pops from two years ago.. These were so adorable and fun to present, people loved them!


OH something else fun happened today -- I purchased my own domain! Now you can visit me directly at www.onesweetbiteatatime.com ! Woo Hoo!

-Elena 

Wednesday, August 27, 2014

[S]ound [O]ff [S]ummer

The nights are getting cooler, the days are a bit shorter and I find myself reaching for a hoodie before I walk out the door each morning.. Fall is quickly approaching and I couldn’t be happier. It’s my favorite season filled with my favorite scents, flavors and activities!

As I wrap up a sizzling summer of endless cake popping and cake decorating, I can’t help but feel unbelievably thankful for the love and support I’ve received this summer, from all my family and friends who gave me such exciting projects to work on! I literally have not stopped, and I will finish strong this coming weekend with my first ever complete dessert display table for a wedding.  I think I would be naturally freaking out over 300 cake pops, a wedding cake and cupcakes, but after everything I mastered this summer, the thought of this wedding makes me ecstatic, and I can’t wait to pull it all together.

But first, I shall share two little projects I did in the last two weeks for a friend from college.  Kyla and her family have been following my pastry journey for a long time now, and recently they placed two orders with me.  One was for some birthday pops in a Hawaiian theme!


Now I’ve done these before but this time I decided to add in little hula skirts!


The second, larger order is for the investment firm in Boston that Kyla works for.  We went with a sailing theme, as the name is Anchor Capital and the owners are huge sailing enthusiasts.

Little sugar sailboats, buoys and anchors!


I had a lot of fun making these, as usual and they were a great way to get some new themes under my belt!


Now on to this wedding display table!!!!!!

-Elena

Saturday, April 19, 2014

Easter Sweetness

I always loved Easter as a kid.. Growing up in two religions meant two Easters most years! So my brother and I always got two Easter baskets.. double the chocolate, double the fun! It also meant two masses (candlelit Midnight mass at the Greek church was always my favorite) and two Easter dinners!

Ham and chicken with cookies and cakes for Catholic Easter, and lamb with roasted potatos and sweet bread for Greek Easter! I was lucky growing up with such strong influences from my two heritages-- French food and Greek food.. just can't go wrong! 

Anyways, both Easters fall on the same day this year so it means lots of food and of course, dessert. I made a giant hydrangea cake (I will be featuring it on the blog tomorrow!) but I also made some adorable pastel cake pops!

I used these mini cookie cutters to shape my cake pops.


Oh how charming!


I hope everyone enjoys their day tomorrow with family and friends! I know I am looking forward to it! 

-Elena

Wednesday, April 16, 2014

Peanut Butter Babies

I started this lovely week off with some baby heads!  My mom’s coworker is having a baby girl and what better way to celebrate than with some bright, cheery little girls mixed with spring flowers!

  
Aren’t these baby girls just the sweetest with their little flower headbands?


I found this scrapbook paper over the weekend in my travels and fell in love.  The brightness of the pattern just evokes the feeling of happiness!


For these little girls, I did two types of cake – classic chocolate, and peanut butter!  I have recently tried a few recipes with PB, however this one just knocked it out of the park for me.  Baking with peanut butter will leave you with a very heavy, thick end result.  This cake is NOT fluffy and soft like a vanilla meringue would be… it’s dense, but moist at the same time! And the creaminess of the PB makes the cake roll beautifully and my secret when making cake balls--- mix the cake with half buttercream, and half peanut butter to get even more of a peanut butter taste!

Everyone has their own preference when it comes to PB—Skippy, Jiff, the natural stuff, chunky, creamy… I grew up on Skippy and don’t mind it (yea I know it’s “fake” pb), however I have grown to love fresh ground peanut butter from Big Y or Whole Foods.  I like the chalkier, crunchy consistency with less of a sugar taste! That is what I used for this recipe but really you can use whatever you’d like.  I also cut down on the fat a bit and subbed almond milk for milk, and coconut oil for vegetable oil but if you don’t care about these things, go for the original recipe!


Creamy Peanut Butter Cake

2 Cups All Purpose Flour
2 Cups White Sugar
1 Tsp Baking Powder
½ Cup Milk
2 Eggs
1 tsp Vanilla Extract (I use vanilla paste, find it a Homegoods!)
½ Cup Butter
1 Cup Water
½ Cup Vegetable Oil
½ Cup Peanut Butter

1.       Preheat oven to 350 degrees.  Grease a baking 9X11inch baking pan. (This cake is thick, don’t use anything smaller than this).
2.       Whisk flour, white sugar and baking soda together in a bowl.
3.       In an electric mixer, beat eggs, milk and vanilla into flour mixture on low until smooth.
4.       In a sauce pan, combine water, butter, vegetable oil and peanut butter and heat over medium heat until mixture is smooth (not boiling!). Should take about 5 minutes.
5.       Stir peanut butter mixture into flour mixture and mix until combined.  Pour into baking pan.
6.       Bake until a toothpick insterted in the middle comes out clean, about 20-25 minutes. Keep an eye on it!

Pair this cake with a peanut butter or chocolate buttercream and YUM!


Now for a 4 day work week which means I get an extra day to work on all the Easter goodies I have planned! 

Enjoy the sunshine! 

-Elena

Sunday, March 30, 2014

Simple Chic Bridal Shower

Today I brightened another rainy day bridal shower with bright, springy cake pops!  My friend Becky is in a wedding this spring for a friend of hers, and I'm happy she asked me to make these for the shower!


These were simple and chic, not a whole lot to them in terms of complexity--the shower was meant to be simple but elegant and that is what I was going for here with scroll piping patters, fondant flowers and muted white/gray colors with pops of pink.


I went with the square plate for this one, as I think they are simple and allow the cakes to shine on their own without the distraction of ribbons and bows. 


Sixty little cakes, in red velvet, vanilla and chocolate flavors, sure to brighten anyone's day!


I hope the bride loves them!


-Elena


Wednesday, March 26, 2014

The Rose Bud Birthday Cake

Even though it is still a little chilly, and I am feeling a bit under the weather, it still does not change the fact that I am yearning desperately for spring.  I want to put the uggs and jackets away and slip on my capris and a light sweater and not worry about being cold! I want the sun to shine and the flowers to bloom and have it be warm enough to run after work everyday without a scarf and gloves!

With my mom's birthday in sight, I knew I wanted to make a cake that evoked the feeling of spring. I wanted to make something fruity and sweet, fresh and aromatic to celebrate her special day. As I perused some of my favorite food blogs, I found a recipe for a fluffy lemon rosemary cake, and I knew this was it!  My mom absolutely loves lemon cake, and the thought of using my absolute favorite savory spices in a dessert was super exciting.  I love rosemary. I go to Whole Foods and buy a few twigs of it, dice it up and mix it with butter to pour over purple potatoes and it's the best side dish EVER.  However, I would never have thought to use it in a dessert!  This cake has proved how versatile this spice is, and now I love it even more.


Adding 100% fresh ingredients to cake batter gives your senses something more-- you're feeling and tasting these ingredients while creating a visual in your head of what you're eating. I love that.


First, the dry ingredients-- flour, baking powder, baking soda, salt and sugar.
Then the wet ingredients--melted butter, buttermilk (I used almond milk + lemon juice), oil, vanilla, lemon zest, egg yolks and then the minced rosemary.


The great thing about this cake is it is made with a meringue! My mom LOVES meringue! I am not a meringue fan (I dislike eggs, a lot) but it is mixed in with all the ingredients at the end of the mixing phase, so it adds a fluffiness to the cake without eating a large layer of meringue on top like a lemon meringue pie.  With that said, then you make your meringue by mixing egg whites and sugar until stiff peaks form. 


 After incorporating the meringue into all the other ingredients CAREFULLY (don't want to deflate all the air you just whipped into your meringue, that's what gives the cake its fluffiness), you bake for 25-30 mins at 350 degrees!  Once the cakes were done, I cooled them, wrapped them and threw them in the freezer until I made the butter cream which was today!  This is when it gets fun-- carving the cake and icing it! 

So I carved away... Due to the meringue they baked a bit unevenly on the top but I did not worry, as you always cut off the top part and the sides of the cake before icing!  I decided on an almond butter cream which I added some fresh lemon juice to.


Filled the middle with butter cream, then added some lemon zest shavings for an extra lemony flavor!  Usually I would take better care in cutting my cake edge and cake round but due to my plan to ice it, it did not matter if it was cut evenly.


Once the middle was filled, I put the second cake on top and did a crumb coat. This crumb coat was a bit thicker than I would usually do, but again, my plans for later meant I needed to do a thicker coat.  I then put it in the refrigerator to set.


Of course, my displays mean just as much to me as my actual product does, as you eat with your eyes before your mouth, so I wanted to choose a cake plate that would be simple but gorgeous, and leave the cake to really shine on its own.  So I chose this vintage glass plate that my Grandma Pauline gave me! I absolute love it and I know my mom will too since it is her mother's plate.


In terms of icing the cake, I have been waiting to try and make a rose bud cake. I think it is such an elegant but again, simple design.  So I attempted, using my Wilton 1M tip.  Just start in the middle and twist as you make round "roses" that sort of overlap each other. You don't want to see the cake underneath. 


And here we have the finished product!  I did two layers of roses on the side, and three in the middle, with the outer layer sort of on top and on the side to blend and give the cake a more "rounded" look.  


Adding yellow and silver sugar pearls on top gave it a more "romantic" feel. Plus my mom loves silver!  And the yellow hints at the lemon flavor!


God I love beautiful food!


My mom loved it and we all devoured a piece as we sat around the table, sniffling and coughing because we're all under the weather! The almond butter cream was so smooth and complimented the lemon cake beautifully! I can't wait to make the cake again, and experiment with different sized tips to make different roses. It was very fun to make and I'm happy my end product was amazing.


-Elena